How to connect an Outlook calendar
📌 When you add an external calendar to Booost, we import 90 days of future events.
If you don't see events beyond that timeframe, don't worry — your calendar is properly connected and will resync every 24 hours.
To connect an Outlook calendar you must first locate your ‘Publish your calendar’, this can be done through Microsoft Outlook in a browser or the Microsoft Outlook computer app.
Currently, the option ‘Publish your calendar’ is not available on the Microsoft Outlook mobile app.
Finding your Calendar URL in Microsoft Outlook (Browser or Computer app)
- Go to the Outlook website
- Sign into the email account associated with the calendar you would like to share.
- Click on the cog icon, on the right-hand side of the top tool bar to go to ‘Settings’.
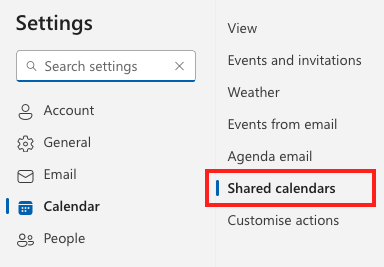
- Choose ‘Calendar’ from the far left-hand list on the ‘Settings’ pop-up menu.
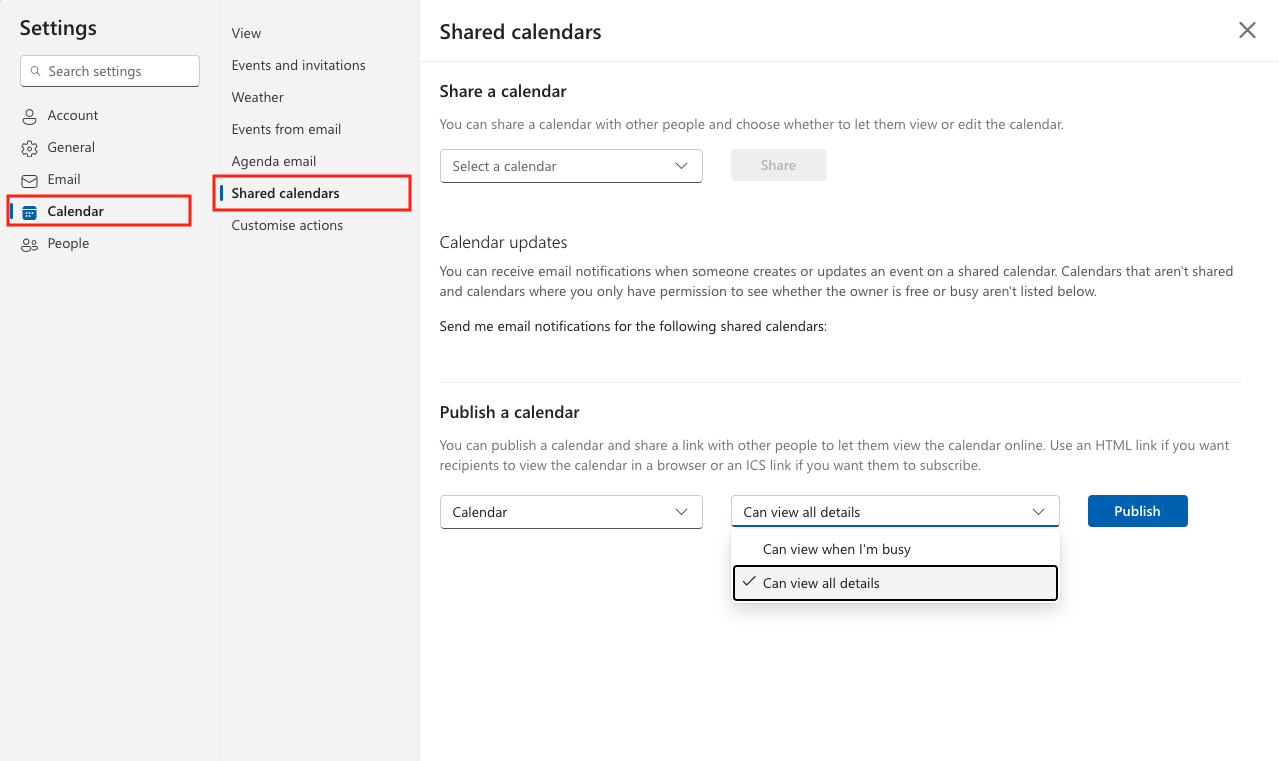
- Choose ‘Shared calendars’ from the middle list on the ‘Settings’ pop-up menu.
If the option for ‘Shared calendars’ is not visible and you using a school, university, or institution account, your calendar may not have permission to share externally.
You may need to get in touch with your timetabling, IT, or disability department for additional information specific to your institution.
- Scroll down to the section titled ‘Publish a calendar’.
- Select the calendar you would like to share from the drop-down list.
- Select ‘Can view all details’ from the ‘Select permissions list’.
- Click ‘Publish’.
- Under the ‘Publish a calendar’ options, there will now be an entry for your chosen calendar with two links.
-
Copy the second link in the list, which is labelled ‘ICS’.

The calendar publishing options, with the 'ICS' link highlighted

If you need further support with finding or publishing your Outlook calendar URL, there are Microsoft support materials available here for personal accounts or student/business accounts.
Instructions to share your calendar in a format that can be used for Booost are available under ‘Publish your calendar’.
Connecting an Outlook calendar to Booost
Calendars can be connected to Booost through Connect calendar in the Quick Add menu, or through Connected calendars in the Account view.
Through Quick Add
- Open the Booost app or webapp
- On mobile, tap the yellow + button in the centre of the bottom navigation bar
- Select Connect calendar
- If you are using Booost on browser/desktop, go to Calendar > Add event > Connect calendar
Through Account
- Open the Booost app or webapp
- Click Account or the icon of a person on the navigation bar
- Click Connected calendars
- Click Connect a new calendar
To connect a calendar
- Paste the public calendar link into the 'Calendar public link to connect'.
- Click 'Next'.
- Click the 'Calendar name' box to give your calendar a name. This will be used to identify the calendar in your 'Connected calendars' list.
- Choose if the calendar type is Academic or Personal.
- Click 'Connect to calendar'
- You will receive a success message to let you know the connection has been successful.
Calendars can be connected to Booost through the add option in ‘Calendar’ view, or through ‘Connected calendars’ in the ‘Account’ view.
What can I do if my events aren't appearing?
If your calendar has connected successfully but your events aren't appearing yet, don't worry. Calendar syncing can sometimes take up to 24 hours due to factors outside of Booost's control.
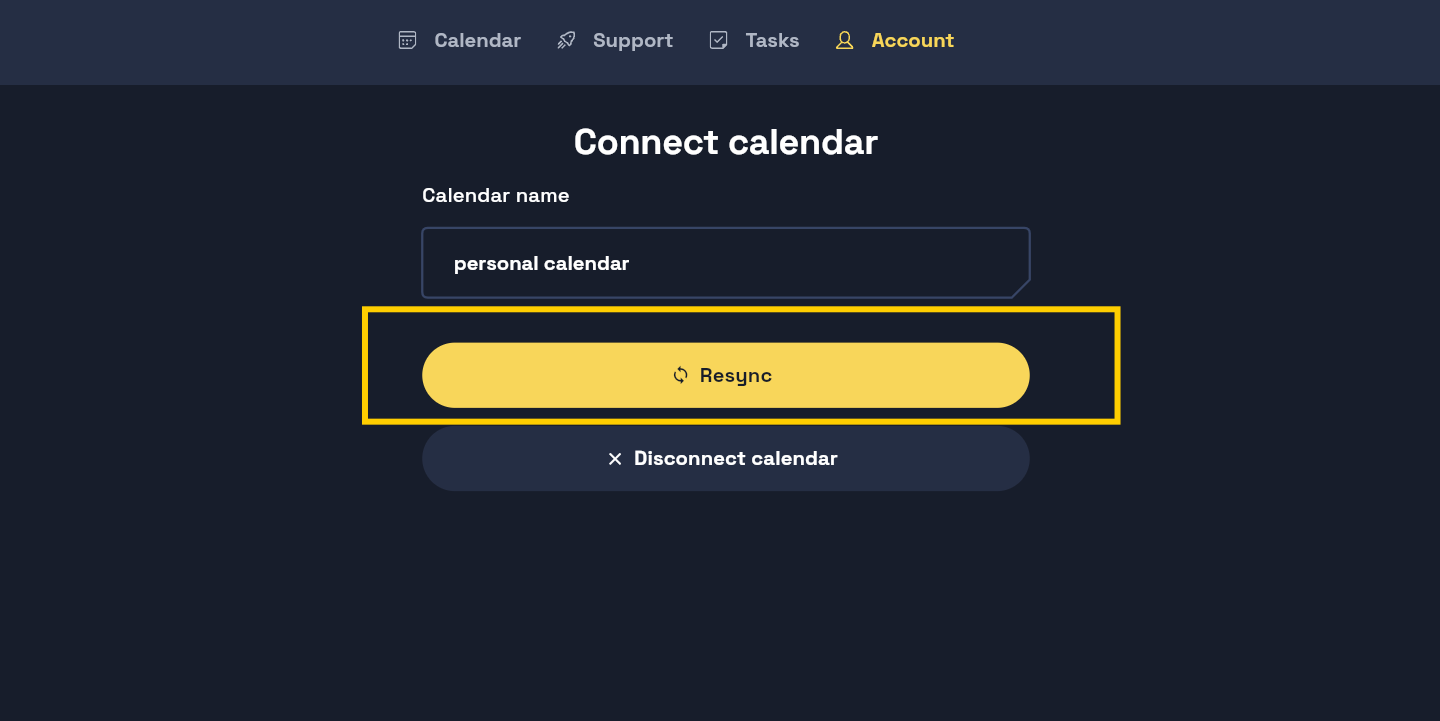
If you'd like to trigger a sync manually, you can do so by navigating to:
Account → Connected Calendars → Select your calendar → Resync
This will request an immediate refresh of your calendar data rather than waiting for the next automatic sync cycle.